Keycloak Proxy Guide: Secure Integration Strategies 2026
As organizations embrace zero-trust architectures and microservices, the stakes for secure authentication have never been higher. Attackers are constantly probing for weak spots in identity flows, making robust defenses essential.
This guide is your roadmap to mastering keycloak proxy integration for 2026 and beyond. You will learn practical strategies to safeguard authentication, streamline scalability, and avoid common missteps.
We will break down keycloak proxy fundamentals, configuration best practices, step-by-step setup, advanced security measures, troubleshooting, and future trends. Get ready for expert insights that transform complex challenges into manageable steps.
Understanding Keycloak Proxy Fundamentals
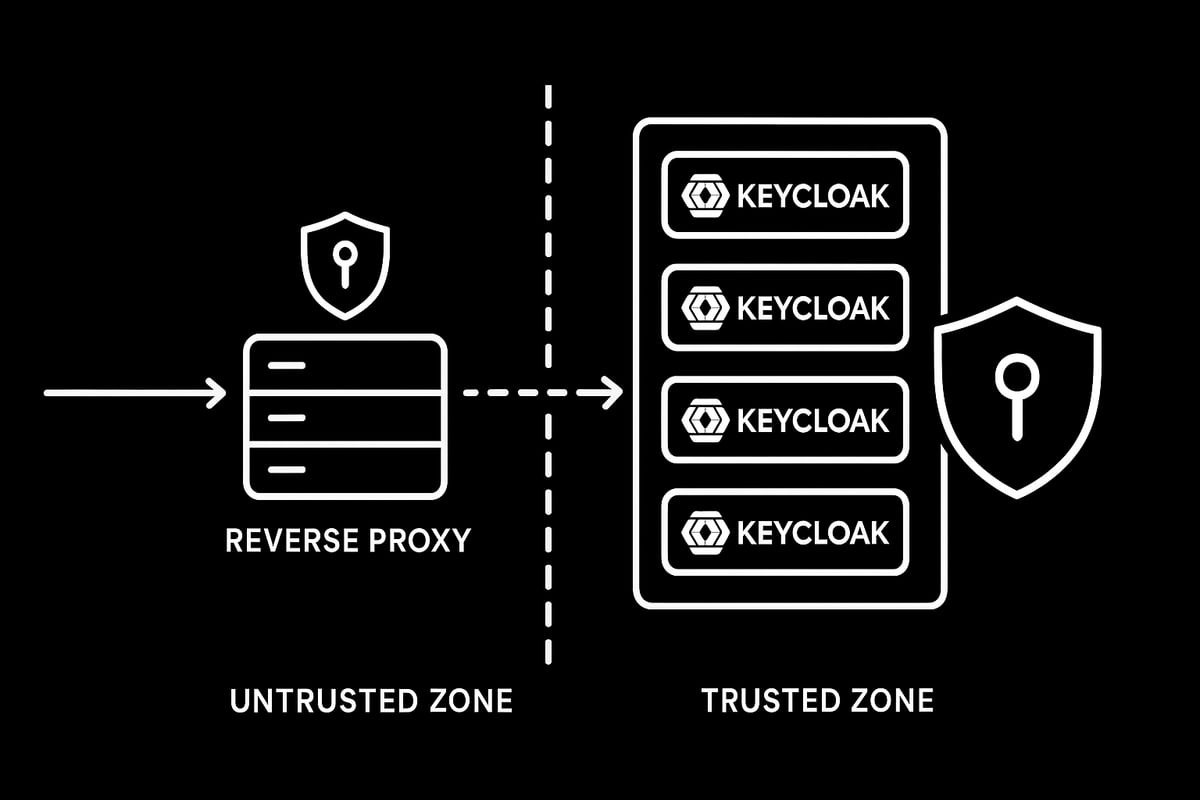
Modern identity and access management relies on robust authentication, and Keycloak delivers this as a leading open-source solution. Yet, exposing Keycloak directly to the internet introduces risk and complexity. That’s where a keycloak proxy setup comes in, acting as a protective layer for your authentication flows.
What Is Keycloak and Why Use a Proxy?
Keycloak is an open-source identity and access management platform, trusted for securing modern applications and APIs. It provides features like single sign-on, user federation, and multi-factor authentication.
A reverse proxy is a server that sits between clients and backend services, forwarding requests and responses. Integrating a keycloak proxy shields Keycloak from direct exposure, helping manage SSL termination, load balancing, and traffic routing. For example, Nginx or HAProxy can serve as a reverse proxy in front of Keycloak, ensuring all external requests are filtered and managed before reaching the authentication server.
Key Benefits of Proxying Keycloak
Using a keycloak proxy offers several advantages for security and scalability. First, it enables network isolation and IP masking, making it harder for attackers to target Keycloak directly. Proxies support load balancing, distributing traffic across multiple Keycloak instances for high availability.
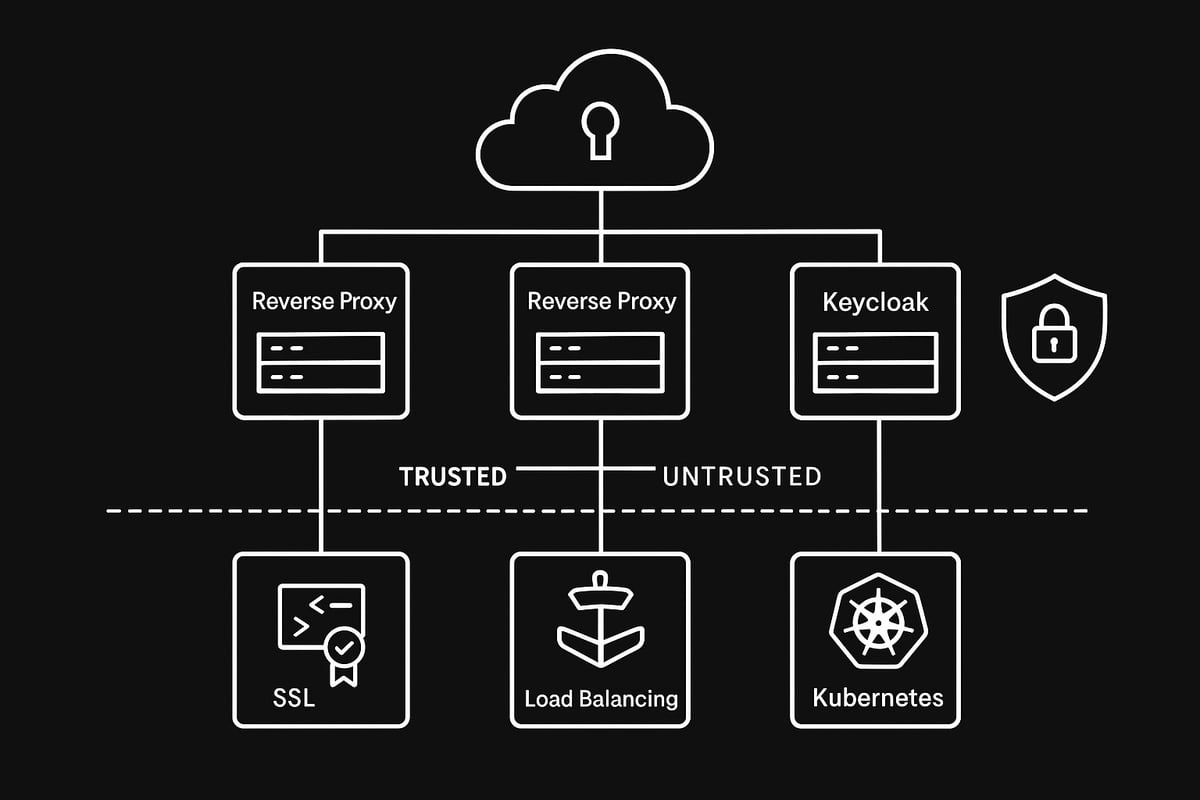
SSL/TLS termination at the proxy simplifies certificate management. Centralized logging and monitoring become easier as all traffic passes through a single point. Finally, a well-configured keycloak proxy improves scalability and performance by offloading certain network tasks and streamlining traffic.
Proxy Modes and Header Handling in Keycloak
Keycloak supports several proxy modes, such as edge, reencrypt, and passthrough. These modes determine how Keycloak processes forwarded requests. Note that the legacy --proxy flag is deprecated in Keycloak v24 and later.
Critical HTTP headers include X-Forwarded-For, X-Forwarded-Proto, X-Forwarded-Host, and the standardized Forwarded header. Keycloak uses these headers to identify client IPs, protocols, and hosts. Configuring header forwarding correctly in Nginx or other proxies is essential for accurate authentication and logging.
For a deeper dive into configuring proxy modes and header handling, consult the official Configuring a reverse proxy in Keycloak documentation.
Real-World Use Cases and Deployment Scenarios
A keycloak proxy is vital for complex deployments. Multi-region and hybrid cloud setups rely on proxies for seamless authentication across diverse networks. In containerized or Kubernetes environments, proxies enable secure ingress to Keycloak, supporting microservices architectures.
Multi-tenant SaaS platforms use proxies to segregate tenant traffic. Even legacy systems benefit, as proxies bridge older technologies with modern Keycloak features. These scenarios highlight the flexibility and necessity of a keycloak proxy in enterprise security strategies.
Step-by-Step Guide: Setting Up Keycloak Behind a Reverse Proxy
Securing your authentication infrastructure starts with a well-architected keycloak proxy setup. This guide walks you through every critical step, from preparing your environment to deploying a robust, production-ready configuration. Whether you are an enterprise architect or a developer, follow along to ensure your Keycloak instance is both secure and scalable.
Preparing the Environment
Before you dive into keycloak proxy configuration, set up your environment with the right tools and network plan.
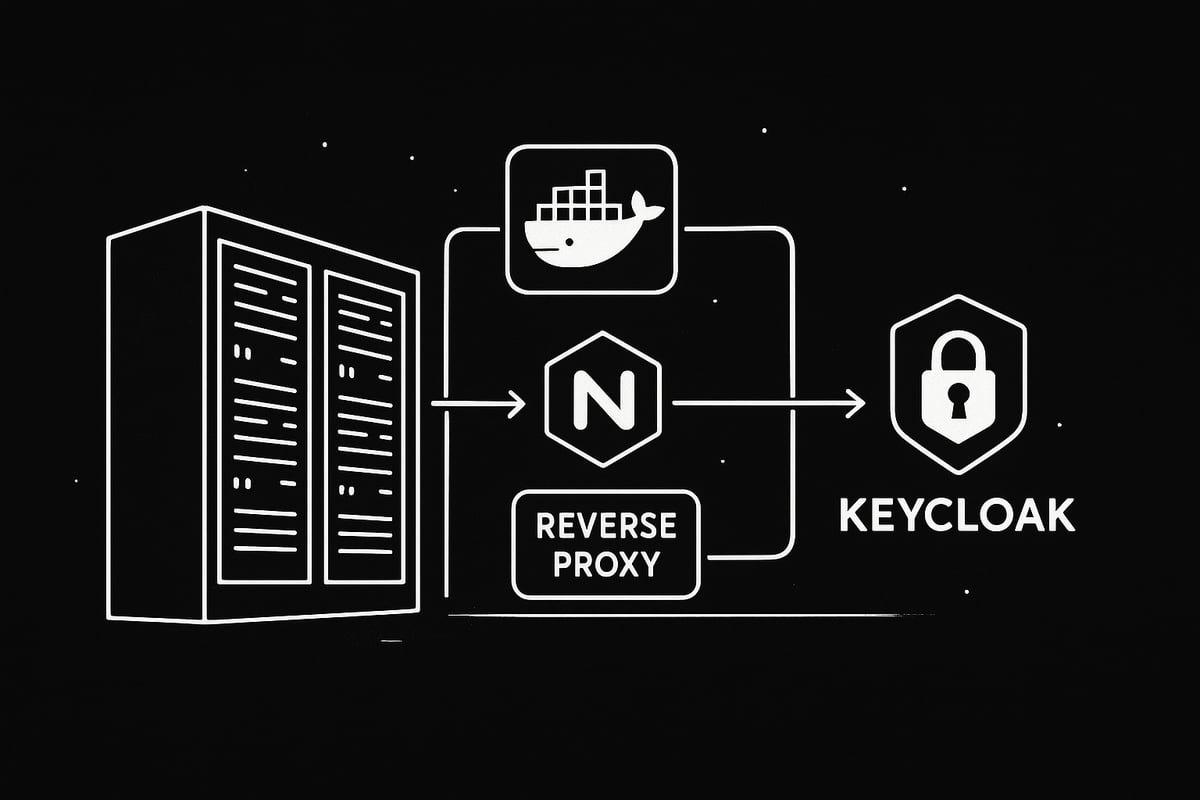
- Prerequisites: Ensure Docker and Docker Compose are installed, or have access to system packages for Keycloak and Nginx.
- Choosing a Reverse Proxy: Nginx is highly recommended due to its performance and flexibility, but HAProxy, Apache, or Traefik can also be used.
- Network Architecture: Design your network to separate trusted (internal) and untrusted (external) zones, placing the reverse proxy at the perimeter.
- Sample Docker Compose Skeleton:
version: "3"
services:
  keycloak:
    image: quay.io/keycloak/keycloak:latest
    environment:
      - KEYCLOAK_ADMIN=admin
      - KEYCLOAK_ADMIN_PASSWORD=admin
    ports:
      - "8080:8080"
  nginx:
    image: nginx:alpine
    ports:
      - "80:80"
      - "443:443"
    volumes:
      - ./nginx.conf:/etc/nginx/nginx.conf
This foundational setup is key for a secure and manageable keycloak proxy deployment. By planning your architecture up front, you minimize risks and future headaches. Remember, a solid foundation enables smooth scaling and easier troubleshooting as your Keycloak usage grows.
Configuring the Reverse Proxy
With your environment ready, it is time to configure Nginx as your keycloak proxy. The core of this step is setting up the proxy_pass directive to forward requests to your Keycloak backend.
- Forwarding Headers: Add
X-Forwarded-For,X-Forwarded-Proto,X-Forwarded-Host, andX-Forwarded-Portheaders so Keycloak can recognize client details. - RFC 7239 Support: Modern deployments benefit from forwarding the standardized
Forwardedheader for better interoperability. - Example Nginx Configuration:
server { listen 80; server_name keycloak.example.com; location / { proxy_pass http://keycloak:8080; proxy_set_header Host $host; proxy_set_header X-Real-IP $remote_addr; proxy_set_header X-Forwarded-For $proxy_add_x_forwarded_for; proxy_set_header X-Forwarded-Proto $scheme; proxy_set_header X-Forwarded-Host $host; proxy_set_header X-Forwarded-Port $server_port; proxy_set_header Forwarded "for=$proxy_add_x_forwarded_for;proto=$scheme;host=$host"; } } - Mapping Configurations: When containerizing, mount your local
nginx.confinto the Nginx container.
For a deeper dive into proxy server options and setup, check out Nginx as a reverse proxy. This ensures your keycloak proxy is leveraging best practices for secure and efficient routing.
Adjusting Keycloak Settings for Proxy Awareness
Keycloak must be explicitly configured to work correctly behind a keycloak proxy. Use environment variables or command-line flags to ensure Keycloak understands the proxy context.
- Enable Proxy Headers: Set
KC_PROXY_HEADERStoxforwardedorforwardedfor correct header interpretation. - HTTP Mode: Use
KC_HTTP_ENABLED=trueto explicitly allow HTTP traffic if needed. - Hostname Strictness: Set
KC_HOSTNAME_STRICT=falseto allow flexible hostnames, especially in dynamic environments. - Base Path: Adjust
KC_HTTP_RELATIVE_PATH=/if your Keycloak instance is served on a subpath. - Proxy Mode: The legacy
KC_PROXY=edgeoption is deprecated in v24+; use header-based configuration instead. - Docker Compose Example:
environment: - KC_PROXY_HEADERS=forwarded - KC_HTTP_ENABLED=true - KC_HOSTNAME_STRICT=false - KC_HTTP_RELATIVE_PATH=/ - Keycloak v24+ Note: Header-based proxy configuration is now the standard, improving security and flexibility.
By tuning these settings, your keycloak proxy deployment will handle headers, hostnames, and paths accurately, preventing common authentication and redirect errors.
Validating the Integration
After configuring both the reverse proxy and Keycloak, validation is crucial. Confirm that your keycloak proxy setup is routing requests properly and handling security as intended.
- Access Through Proxy: Open your browser and visit the Keycloak endpoint via the proxy’s external URL.
- Check Logs: Look for correct header recognition in Keycloak and Nginx logs. Headers like
X-Forwarded-ForandForwardedshould reflect the client’s real IP and protocol. - HTTPS Offloading: Verify that HTTPS requests are being terminated at the proxy, and Keycloak responds with the correct scheme and redirects.
- Network Validation: Use browser developer tools or
curl -vto inspect requests and confirm headers. - Example Validation Flow:
- Log in via the proxy endpoint.
- Observe the base URL and callback redirects.
- Ensure all resources load without mixed content warnings.
This step ensures your keycloak proxy is functioning seamlessly, providing both security and a smooth user experience.
Example: Full Docker Compose and Nginx Setup
To bring everything together, here is a complete example of a production-ready keycloak proxy deployment using Docker Compose and Nginx.
- docker-compose.yml
version: "3" services: keycloak: image: quay.io/keycloak/keycloak:latest environment: - KC_PROXY_HEADERS=forwarded - KC_HTTP_ENABLED=true - KC_HOSTNAME_STRICT=false - KC_HTTP_RELATIVE_PATH=/ ports: - "8080:8080" nginx: image: nginx:alpine ports: - "80:80" - "443:443" volumes: - ./nginx.conf:/etc/nginx/nginx.conf - Nginx Dockerfile
FROM nginx:alpine COPY nginx.conf /etc/nginx/nginx.conf - Key Configuration Lines: The
proxy_set_headerdirectives ensure Keycloak receives accurate client and protocol information. - Deployment Commands:
docker-compose up -d
This configuration provides a scalable and secure keycloak proxy deployment. By following these steps, you can confidently deploy Keycloak behind a reverse proxy for modern, production-grade authentication needs.
Advanced Security and Integration Strategies
Securing your keycloak proxy setup requires more than a basic configuration. As organizations scale and threats evolve, advanced strategies become critical for maintaining both security and agility. Let’s explore the essential practices for robust, future-ready integration.
SSL/TLS Termination and Secure Communication
Protecting user data starts with encrypting traffic between clients, the proxy, and Keycloak. Most deployments offload SSL/TLS at the keycloak proxy layer, simplifying certificate management and reducing backend complexity.
Generate certificates using trusted authorities and install them on your proxy. Enforce HTTPS by redirecting all HTTP requests and use strong TLS settings. For Nginx, your configuration might look like this:
server {
  listen 443 ssl;
  server_name keycloak.example.com;
  ssl_certificate /etc/nginx/certs/fullchain.pem;
  ssl_certificate_key /etc/nginx/certs/privkey.pem;
  location / {
    proxy_pass http://keycloak:8080;
    proxy_set_header X-Forwarded-Proto $scheme;
    proxy_set_header X-Forwarded-For $remote_addr;
  }
}
For more in-depth guidance, see this SSL proxy configuration guide covering best practices for securing your keycloak proxy. Regularly renew certificates and monitor for vulnerabilities to keep your integration resilient.
Load Balancing and High Availability
Scaling Keycloak horizontally boosts reliability and performance. Deploy multiple Keycloak instances behind your keycloak proxy to distribute traffic and minimize downtime.
Use Nginx’s upstream block for load balancing:
upstream keycloak_backend {
  server keycloak1:8080;
  server keycloak2:8080;
}
Enable sticky sessions so users remain authenticated across requests. Health checks detect failed Keycloak nodes, allowing your proxy to reroute traffic. This approach ensures that your keycloak proxy can handle increased load and failover seamlessly.
Fine-Tuning Proxy Headers and Hostname Management
Correct header forwarding is vital for accurate client IP, protocol, and host detection. Set X-Forwarded-For, X-Forwarded-Proto, and Forwarded headers in the keycloak proxy so Keycloak can generate proper URLs and logs.
In complex environments, adjust header handling for chained proxies or CDN integration. Multi-tenant and multi-domain scenarios require setting KC_HOSTNAME and KC_HOSTNAME_ADMIN to match your public endpoints. This fine-tuning ensures your keycloak proxy delivers a seamless experience for every user.
Security Hardening Best Practices
Never expose Keycloak directly to the internet. Restrict access to the backend using network policies and firewall rules. Only allow trusted proxies to communicate with Keycloak.
Limit allowed HTTP methods and headers at the keycloak proxy. Monitor logs for suspicious activity, setting up alerts for anomalies. These steps help your keycloak proxy defend against common attacks while ensuring compliance with security standards.
Integrating with Container Orchestration and Cloud Platforms
Running Keycloak and your keycloak proxy in Kubernetes or on cloud platforms unlocks automation and scalability. Use Kubernetes Ingress or cloud-native load balancers (like AWS ELB or Azure Application Gateway) to route traffic.
Automate deployments with Helm, Terraform, or Ansible, and manage configurations via ConfigMaps and Secrets. Here’s a simple Kubernetes Ingress example for Keycloak:
apiVersion: networking.k8s.io/v1
kind: Ingress
metadata:
  name: keycloak
spec:
  rules:
    - host: keycloak.example.com
      http:
        paths:
          - path: /
            backend:
              service:
                name: keycloak
                port:
                  number: 8080
This approach makes your keycloak proxy integration cloud-ready and easy to scale.
Future-Proofing: Preparing for Keycloak and Proxy Changes in 2026
Stay ahead by tracking deprecations, especially around legacy proxy settings. Keycloak is moving toward modern header handling, with greater support for mTLS and service mesh integration.
Adopt zero-trust principles and plan for OAuth2 and OpenID Connect updates. Integrate your keycloak proxy with platforms like Istio or Linkerd to take advantage of advanced security and observability features. Regularly review Keycloak and proxy release notes to keep your configuration up to date.
Common Pitfalls and How to Avoid Them
Even experienced teams can stumble on keycloak proxy integration. Common errors include mismatched base paths, incorrect port or host forwarding, DNS resolution issues, and overly permissive web origins.
Here’s a quick-reference table:
| Issue | Symptom | Solution |
|---|---|---|
| Base path mismatch | 404 errors | Check KC_HTTP_RELATIVE_PATH |
| Wrong port/host | 502 Bad Gateway, refused | Verify proxy_pass and headers |
| DNS resolution | NXDOMAIN, 403 errors | Update host and DNS settings |
| Over-permissive origins | Security warnings | Tighten web origin config |
Double-check your keycloak proxy configuration at each step to avoid these pitfalls and maintain a secure, reliable system.
Troubleshooting Keycloak Proxy Integrations
Troubleshooting a keycloak proxy setup can feel daunting, especially when authentication flows break or users report odd redirect loops. The key is to approach problems methodically, using the right tools and strategies. Let’s break down the most common integration issues and how you can resolve them efficiently.

Diagnosing Configuration Issues
When a keycloak proxy integration fails, start by inspecting both Keycloak and proxy logs. Look for authentication errors, failed requests, or unexpected redirects.
Use tools like curl to check HTTP headers. For example, run:
curl -I https://your-keycloak.example.com
Verify the presence of X-Forwarded-For and X-Forwarded-Proto. Missing or misconfigured headers often cause login failures or misrouted requests.
Browser developer tools are invaluable. Inspect network traffic for status codes like 403, 404, or DNS errors such as DNS_PROBE_FINISHED_NXDOMAIN.
For foundational setup tips, see Linux reverse proxy basics, which covers essential header forwarding and diagnostic methods.
Resolving Redirect and Path Problems
A frequent source of frustration in keycloak proxy deployments is incorrect base path alignment. If Keycloak is unaware of the proxy’s external path, users may encounter 404 errors or broken resource links.
Check your Nginx location blocks. Ensure they map closely to Keycloak’s relative path. For subpath deployments, use the KC_HTTP_RELATIVE_PATH environment variable to adjust Keycloak’s base URL.
Path rewrites can also introduce unexpected behavior. Always test login and logout flows after changes. If you notice endless redirects, double-check both proxy and Keycloak path settings.
Keep an eye on host and port forwarding. Incorrect values here may result in ERR_CONNECTION_REFUSED or 502 errors.
Fixing SSL/TLS and HTTPS Redirection Errors
SSL and HTTPS issues are common in keycloak proxy architectures. Mixed content warnings or redirect loops often stem from misconfigured certificates or missing headers.
First, confirm that your certificates are valid and the chain is complete. Next, ensure the proxy forwards the X-Forwarded-Proto header so Keycloak knows the original scheme.
To enforce HTTPS, configure HTTP to HTTPS redirects at the proxy and enable HSTS for added security. If you experience redirect loops, verify that both Keycloak and the proxy agree on the external URL and protocol.
You can troubleshoot SSL issues by running:
openssl s_client -connect your-keycloak.example.com:443
This will surface certificate or handshake problems quickly.
Performance and Scalability Optimization
Optimizing a keycloak proxy setup involves identifying and eliminating bottlenecks. Start by monitoring resource usage in both Keycloak and the proxy layer.
Tune Nginx worker processes and connection limits for your expected traffic. Enable gzip compression and caching in Nginx to reduce backend load.
Here’s a quick comparison table for common bottlenecks:
| Bottleneck | Solution |
|---|---|
| High CPU usage | Scale horizontally |
| Slow responses | Enable caching |
| Connection limits | Increase worker settings |
For more advanced performance tips, check out 8 Ways to Optimize Keycloak Performance, which covers reverse proxy tuning and SSL optimization.
Always monitor logs and metrics. Scaling out with additional Keycloak instances behind your proxy can ensure high availability and better user experience.
Keycloak Proxy Integration: Best Practices and Future Trends
Integrating a keycloak proxy is more than a technical step, it is a commitment to robust security and future-ready scalability. As organizations evolve, following best practices ensures your authentication flows remain resilient and adaptable.
Security-First Configuration Checklist
A secure keycloak proxy setup begins with a strong configuration foundation. Use this checklist to cover the essentials:
| Area | Best Practice |
|---|---|
| Headers | Ensure proper forwarding (X-Forwarded-*) |
| SSL/TLS | Terminate SSL at the proxy, enforce HTTPS |
| Firewall | Restrict backend Keycloak access |
| Hostname | Configure strict and consistent host settings |
| Logging | Enable centralized logging and monitoring |
For a deeper dive into production-grade configurations, consult the Red Hat build of Keycloak 26.2 Server Configuration Guide. Keeping your keycloak proxy aligned with these recommendations will help you avoid common vulnerabilities.
Automation and Infrastructure as Code
Automating your keycloak proxy deployment leads to repeatability and fewer errors. Use tools like Docker Compose, Helm, or Terraform to manage infrastructure as code.
For example, maintain your Nginx and Keycloak settings in version control. This approach simplifies rollbacks and ensures consistency across environments. A sample GitOps workflow could look like this:
- Store all config files in a Git repository.
- Use CI/CD pipelines to deploy updates automatically.
- Review and approve changes before production rollout.
By automating keycloak proxy integrations, teams save time and reduce manual misconfigurations.
Evolving Standards and Community Recommendations
The keycloak proxy landscape is continuously changing. Stay updated on the latest Keycloak roadmap, especially around proxy header handling and cloud-native features.
Community best practices often emphasize secure header forwarding, minimal exposure of backend services, and regular updates. Keep an eye on OAuth2, OIDC, and reverse proxy technology trends. Participating in forums and reading official documentation helps you adapt to new standards as they emerge.
Staying engaged with the community ensures your keycloak proxy remains secure and efficient as new challenges arise.
Preparing for Scalability and Zero-Trust Architectures
Design your keycloak proxy integration for growth and future security models. Support multi-region and multi-cloud deployments by using scalable proxies and resilient network designs.
Integrate with service mesh platforms like Istio or Linkerd to enable zero-trust architectures. Consider leveraging advanced reverse proxy options, such as Cloudflare, for added protection at the edge. For more on this, see this Cloudflare reverse proxy integration.
A forward-thinking approach to keycloak proxy implementation ensures you are ready for tomorrow’s requirements.If you’re ready to put these Keycloak proxy strategies into action and want a solution that offers both speed and peace of mind, you’re in good company. With PinguProxy, you can rely on high speed proxies and ironclad privacy to secure your integrations - no matter how complex your setup or where your users are located. We’ve talked about future proofing and staying ahead of changing security standards, so why not take the next step today? It’s quick and easy to Get Started Now and see how seamless and secure your deployments can be.